

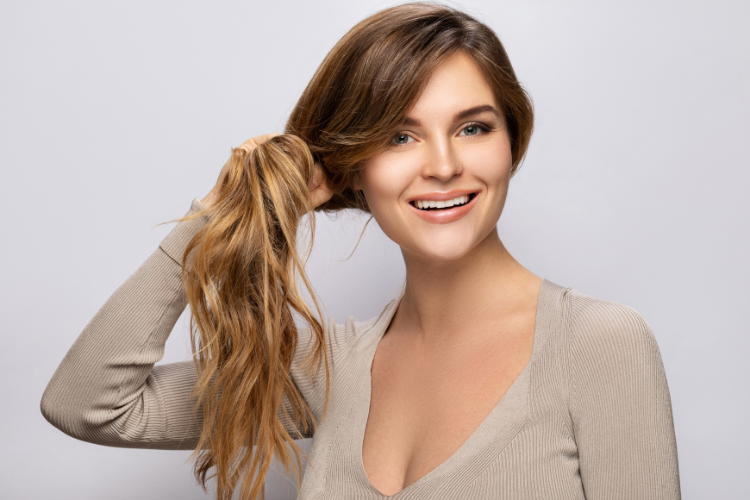
The first ombre I ever did was while I was in cosmetology school ten years ago, and it was the newest trend in the hair world. It was a bright blonde ombre that faded into black hair at the top.
There was only one way to do an ombre at this time and very little versatility in style. Since then, people have come up with a few techniques to create a wide range of ombre styles, which I’ll go over in this types of ombre hair guide.
Ombre is a trend that has morphed into new styles over the years, which usually happens with a technique that works well. We can actually thank ombre for one of the most popular hair color trends today, balayage. Before ombre, nobody even thought of doing a color that naturally blended up into the roots.
This hair color trend has made a profound impact on the hair color world. That’s why I’m so excited to dive into this guide that will open your eyes to just how beautiful ombre hair can be.
My Favorite Types of Ombre Up Front
There are a few ways to do various types of ombre. Most of the time, ombre is done with a teasing technique but can also be done with color smudging or a root smudge. My favorite types of ombre to do are a color melt, multi-toned ombre, and sombre. These are also probably the ombre types I find myself doing most on clients.
What is Ombre?
An ombre is when one color gradually fades into another color. You can see this trend in many things, including nail art, clothing, accessories, and our topic for today, hair.
When you ombre hair color, typically, you fade color on the ends of the hair up to the roots. You can fade multiple colors along the length of hair or just two colors. There are a few methods to achieve ombre hair and a few different types of Ombre hair, which we’ll go over below.
The Difference Between Balayage and Ombre
Many people tend to confuse an ombre and balayage because they are very similar. The main difference between a balayage and an ombre is a balayage is a freehand highlighting technique, so it creates dimension throughout the hair.
An ombre is a gradation from one color at the roots to a completely different color at the ends. To see more on the differences between balayage and ombre, check out my other article Ombre vs. Balayage.
Benefits of Doing an Ombre
Not only does ombre look unique and beautiful, but it is a hair color with many advantages as well. Here you’ll find a few benefits with an ombre that may make you choose this exciting color over your usual style choice.
Low Maintenance
The number one advantage of an ombre is that it lasts a long time. This only applies if you are ombreing a color into your natural root. Still, since that color is faded into your natural color, you can let it grow out without worrying about horrible roots. Most of the time, your ombre color fades before you have to move up the ombre, so you may have to simply tone or give it a gloss to brighten your ombre.
Soft Commit to a New Color
An ombre is a great way to try a new color before fully committing to it because you’re only coloring half of your hair but still get a good idea of what it would look like all over. It is also much easier to change your hair color from an ombre to blend in with your root color. If you like the color and decide to move forward with it all over, you apply the color to the top section that you didn’t color before.
You Can Cut it Off (Eventually)
Ombre is just about the only color you can grow out completely without ever touching it up, and it never looks bad. This makes it great for those who like to color their hair every once in a blue moon but always return to their natural color. You should know that it can take six to twelve months to grow out an ombre ultimately, depending on how long your hair is and how far up the ombre is brought on it.
3 Different Ways to do an Ombre
If you’ve ever colored hair before, you know there is always more than one way to achieve a goal. The same goes for ombre hair. There are three different methods that I like to use to achieve ombre hair color. I’ll go over these three different methods and how to do them below:
Teasing Method
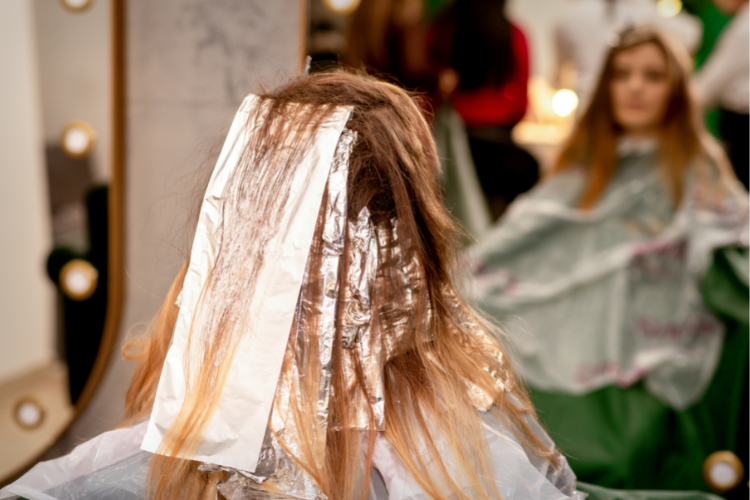
This is the most used method to get ombre hair color because it is the technique you use to fade one color up to your natural root color. I like to do diagonal sections in the hair when teasing and applying your chosen color. The sections should be no more than a half inch to 3/4 inch so that you can thoroughly saturate the hair in hair dye.
When teasing each section, start your comb near the bottom of the hair and push the comb up towards your root. I like to tease the section three to four times for ultimate blending. When painting on the color, start applying about an inch higher than where you want your ombre to start on the hair. Once the tease is combed out, the ombre will move down slightly.
Leave your hair teased for the entire processing time, during the rinse-out, and during the shampoo. Once all of the dye is removed, apply a heavy-duty detangling conditioner to the teased hair and ends and start brushing that tease out. Warning: This takes time. Then, you can finish as you usually would, toning, rinsing, and blowdrying.
Color Smudging
Color smudging is done when you ombre two or more hair dyes together. There are a few different ways to smudge color together, but it’s pretty simple either way. I like to start by applying my top color all over to where you want your ombre to start.
You can then go back through and apply your end color or the next color down your ombre. If you are doing one color faded up to the root color, I like to use my hands to smudge the colors together. I take each section between my pointer and middle finger, clasp my fingers down around the section, and move my fingers up and down the middle of the strand until the colors look blended.
If you are doing more than two colors, I recommend using your brush to smudge the colors together. This makes the blending a little more precise since you’re working with less blending space. Place your color brush where the two colors meet and gently wisp the brush back and forth until the line is gone.
Root Smudging
Many people don’t see a root smudge as a type of ombre because it’s become quite popular as a service itself, but it is, by definition, a root color fading into an end color, an ombre. Typically I like to do root smudges for an ombre look on those with a pixie cut or those that want a more natural look.
You can do a root smudge at the shampoo bowl with your toner if you are a blonde looking for something more blended at the root. To do this, apply your desired root color to the first inch of your roots.
Once that is all over your roots, you can take a fine tooth comb and comb the root color down into the rest of your hair. Make sure you wipe off your comb every few sections or the color build-up will cause splotches.
If you want to ombre an existing color into your roots or a different root color, like red hair into a black base or blonde highlights into your natural color, start applying the root color like an ordinary touch-up.
Once the color is applied to the roots all over, you can take a brush or fine tooth comb and brush that color down into the rest of your hair. Make sure you are combing the color down in sections to ensure everything is even.
Check out my Root Smudge Guide for a more in-depth tutorial on how to do it.
Types of Ombre Hair
Now that you know the three techniques to achieve an ombre look, we can dive into the different types of ombre hair you can do. Every kind of ombre is done by using one of the methods listed above, and we’ll go over the differences here:
Blonde Ombre
@alexlovescolour #hairlove #brushout #haircolor #balayage #balayageombre #highlights #alexlovescolour #manepainters #boondehair #sydney #australia
♬ original sound – Alex Loves Colour
A blonde ombre is the typical ombre that you see on most people. Usually, people ombre the blonde color up into their natural color with a teasing technique, but you can also do a root smudge with a darker color at the top if you’re already blonde. I like to start the ombre at different lengths with each section to get a more blended look.
This is an excellent look for those that want a blonde that is easy to maintain and bright in color. You get an all-over blonde look, depending on how high you bring your ombre, without getting that horrible regrowth line. This is also a great way to try blonde (or a darker root if you’re already blonde) if you aren’t sure about your decision.
Vivid Ombre
Many people decide to go with an ombre when trying out vivid colors. This is because it is easier to grow out if you don’t like it, or you can change it back to a natural color to blend in with your roots. You do a vivid ombre the same way as a blonde ombre, except you cover the blonde with your chosen vivid color.
I like to offer an ombre when younger children come in wanting a vivid color. Many parents don’t realize that you must bleach the hair before applying a vivid color and assume the color just fades out. The ombre makes it so the vivid color can fade out, and the child can eventually come back in to have the blonde ombre cut off their hair once it’s grown. To get some vivid ombre inspiration, check out Purple Ombre Ideas and Blue Ombre Hair Ideas.
Reverse Ombre
A reverse ombre is when the ends of the hair are darker than the top. I’m not usually a massive fan of this one because it’s challenging to make it look like your hair color hasn’t just grown out and you have some mad roots. The one way I have seen this done that I like is with bright blonde at the top and vivid or super dark color on the ends.
If you are doing color at the top that does not involve bleach, you can use the color smudge method for this hair color. If you want blonde at the top, you will first have to bleach all of your hair to your desired blonde shade and then do an ombre on the ends with the darker color using the teasing technique.
Ombre with Balayage
For those that want a balayage look with the ends completely blonde, doing an ombre and a balayage technique together is the way to go. You simply can not get the super blonde look with balayage alone, and ombre allows you to make the hair as bright as possible by fully saturating the hair instead of only painting on the surface of the hair.
I like to alternate techniques with each section when I do an ombre and balayage together. I’ll do one diagonal half-inch section ombre with the teasing approach and the next half-inch section painted on balayage. This makes most of your hair bright blonde while still giving you the dimension we all love about balayage.
Sombre
This word is actually a mash-up of sun and ombre. A sombre is a natural-looking ombre that looks like you’ve spent a little too much time out by the pool, and the sun has naturally lightened your hair over time, hence the word mash-up. Usually, this type of ombre is only a couple of shades lighter than your natural color and has some pieces around the face that come up higher.
Whenever I do a sombre on clients, I like to do a mixture of the original teasing technique with some teasy lights sprinkled in. Teasy lights are like your typical foil highlights, except they are teased to create an ombre highlight. I bring a few of these up higher throughout the hair and really focus them around the face to give the ombre a more natural blend.
Peek-a-Boo Ombre
A peek-a-boo ombre is one that only shows from the underneath of your hair. You can do any color with this, but most people do peek-a-boo ombre with vivid colors. This gives you the benefit of the easy grow-out but also stands out a little less than a vivid ombre.
This is a perfect look for those just trying to test out vivids before fully committing. It’s another technique I like to do on young children who want vivids because it grows out quickly and doesn’t freak the parents out nearly as much. You can either ombre one large section under the hair or do peek-a-boo chunks of ombre throughout the hair.
Color Melt Ombre
Color melts are a lot of fun because they are subtle ombre that you can’t tell precisely when it starts fading to the next color. I like to do these with two colors that are the same shade, but one is slightly lighter and brighter than the other. For example, a deep maroon base blended into fire red ends. Red Ombre Hair Ideas has a few more great examples of this.
A color melt is done with the color smudging method of ombre. You could even do a color melt with more than one color. One of my favorite color melts is a red base color, faded to a copper center and finished with a golden blonde on the ends. This requires three colors to achieve. However, it can get tricky doing more than that.
Multi-Toned Ombre
This ombre is for those that want to do something crazy. Although I think they are one of the prettiest types of ombre on this list. Multi-toned ombre is done with three or more colors, and you can do multiple colors down the length of the hair or layer different colors of ombre with each section.
These are usually done with vivid colors, and I like to keep them within the same lightness, such as pastels, bright colors, or deep colors. Multi-toned ombre is typically done with a color smudge technique over previously lightened hair. If you ombre multiple tones into your natural root, you’ll have to lighten the hair first with a teasing technique and then use the smudging method with the vivids.
Shadow Root Ombre
@jeweldoeshair #boostofhope #hairvideos #hairtutorials #haireducation #haircolortutorial #hairvideo #hairtok #hairstylist #hairtransformation #rootshadow #hair
♬ Giddy Up Let’s Ride – Kinsu
A shadow root is a darker root that is added to blonde hair in the shampoo bowl while toning. These are usually only the top inch or less of hair at the root. If you haven’t already guessed it, you will use a root smudge technique to get a shadow root. To learn more about shadow roots and see a few good ideas, check out our other article What is Shadow Root Hair?
I find myself doing a shadow root on those with a pixie cut more than any other person. This is the only way for people with really short hair to get an ombre effect because the hair is too short to tease. I also like to do these on girls who want their blonde highlights to look more lived in, in which case I will use a demi-permanent instead of permanent color to make it a bit translucent.
Dip Dyed Ombre
Dip-dye is a hair color trend that was super popular in the 80s and early 90s that semi-recently resurfaced. This type of ombre is only done on the bottom couple of inches of the hair. I use the teasing technique to get this look, but instead of teasing three to four times, I’ll only tease the hair twice in each section. This gives the color a nice contrast and makes it pop more.
This color is ideal for those that want a temporary pop of color because the dip-dye will be gone after a couple of trims. It’s probably one of the best ways to give a kid vivid color over summer break because you can simply cut off the colored ends by the time school starts again. I think it’s also just a fun way to add a pop of color to your hair without being too drastic.
Partial Ombre
A partial ombre is any ombre that is not done all over the head. You can ombre just the top section of your hair, only the bottom half of your hair, or my personal favorite, a big money piece of ombre around the face. Since this is basically any of the above ombre types done on a part of your head, you can use any technique to achieve it.
I like to use two or more colors with partial ombre, with the base different from your natural color. If you do a partial ombre into your natural color, it can make the ombre color look like misplaced color or grown-out color. If you change the color of the entire partial section, it gives the ombre some structure.
FAQ’s
Answer: These are two different hairstyles, so this is ultimately up to you and what you like. However, if you want something that is trendier and has more budget-friendly options, go for a balayage. Ombre can be more expensive than balayage because you are using a lot more color and aren’t skipping any sections.
However, ombre is the way to go if you are looking for a graduated vivid color style because vivids look much brighter on ombre than balayage.
Answer: Usually, ombre is relatively expensive. Doing an ombre is a long and tedious process because, most of the time, they are a double process, and you have to tease all of the hair, which is a pain. You are also using nearly as much color as an all-over color, and sometimes more if you have to do a double process to reach your hair color goals.
You can expect to pay from $100 to $300 for an ombre. Partial ombres are on the cheaper end and double process ombres, like vivid colors, are closer to the upper end of that price.
Answer: An ombre lasts as long as the color doesn’t fade. Since an ombre is fading the hair color into the root color, it never gets a grow-out line or looks like it needs to be done. You will most likely have to tone or brighten up the color before you have to move the ombre up. To give you a general idea, hair grows about a half inch monthly. So in six months, your ombre will grow three inches.
Answer: This is totally up to you and what you like. You can start a few inches away from the root for a shadow root look that will last a long time. You can also begin the ombre near the bottom with only a couple of inches of hair being colored, giving you more of a dip-dye look. Typically people like their ombre to start somewhere around the middle of the length.
Answer: Ombre hair is very much still in style, and this is because of the number of styles you can do with it. The original ombre that came out ten-plus years ago with blonde hair may have dwindled a bit, but you still have the dip-dye, shadow root, sombre, vivid colored ombre, and much more are still very trendy.
Is an Ombre Right For You?
Ombre may be much more versatile than you thought now that you’ve read through all this information. There are so many different ways to do an ombre that there is a very high chance that it is perfect for you, especially if you are the type of person who only likes to touch up their color every few months.
You can make it look natural, do some of the prettiest vivid color styles, and create beautiful, lived-in blonde looks with ombre. My personal favorite types of ombre are sombre, color melt, and multi-toned ombre. Between these three choices, I think anyone can find an ombre that is right for them.
Looking for more interesting readings? Check out:
- Purple Ombre Ideas & Style Guide: Which Trending Style Will You Choose?
- Red Ombre Hair Ideas & Style Guide: What Look Do You Want?
- Black Ombre Hair Ideas & Style Guide: Which Is Your Favorite Look?