

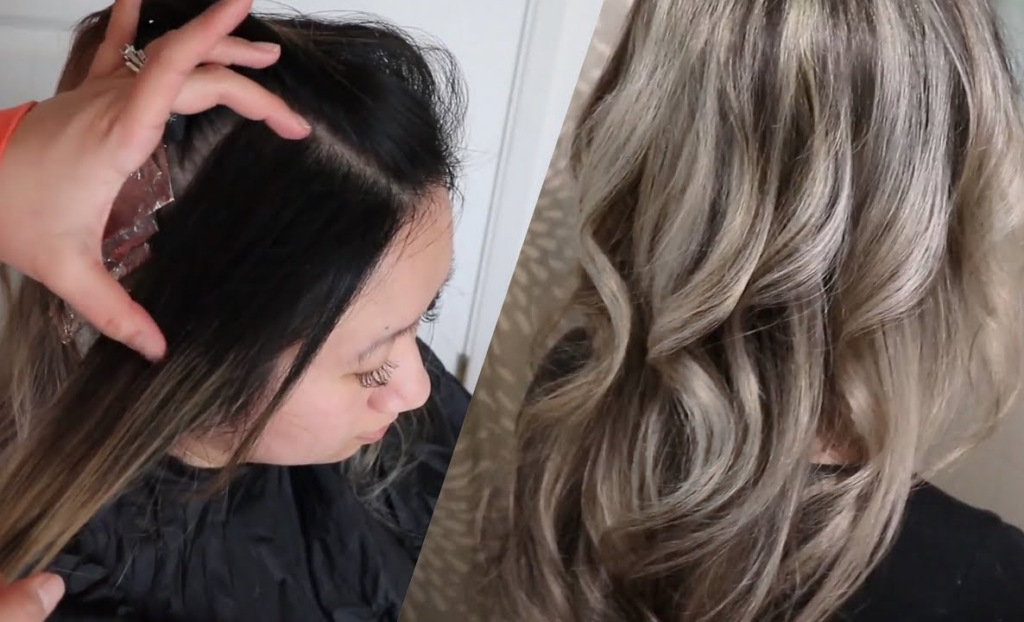
Did you know that the average American colors their hair four to five times a year? I was surprised to read that statistic. While it’s always fun to color your hair, touching up your roots and spending a lot of money at the salon isn’t fun. Fortunately, there are solutions.
Highlights are maintenance-free, and you can easily do them at home. Here’s my how-to-do highlights at home guide so you can get a great hair look DIY.
Bottom line up front: You can do highlights at home. Before highlighting your hair, know which technique you want to try and the colors you’re using. From here, you can find the best products, do a strand test, paint the dye on alternating strands, use a toner (if applicable), and follow up with a deep conditioner. If you’re bleaching your hair or are doing any complex looks, it’s best to go to a professional.
Highlighting Tips to Know First
Before I explain how to do highlights at home, I want to explain some tips. This will ensure you get the best results.
Different Highlighting Methods
When I say “highlights,” I’m actually talking about different methods to add more dimension to your tresses.
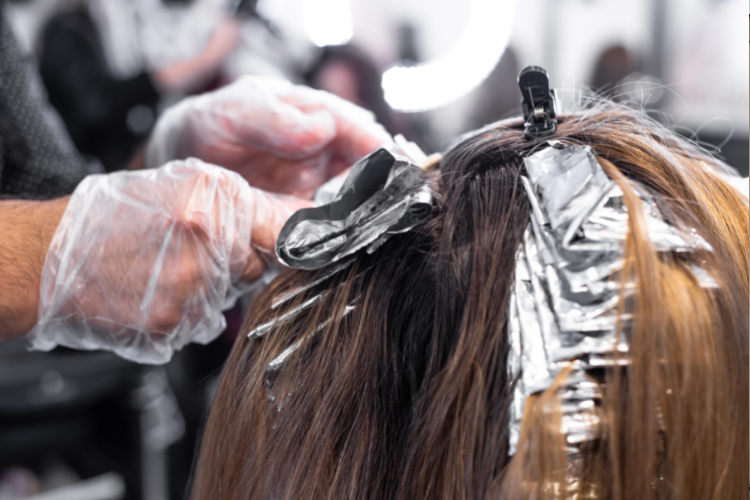
Foils are likely what you think of when the word “highlighting” comes to mind. If you get your highlights done by a professional, aluminum foil acts as a way to separate the highlighted sections from the non-highlighted sections. The results vary from subtle to bright, depending on the color used and how much foil.
If you don’t want to do foils, you can opt for a balayage. A balayage is a highlighting technique where the color is painted on your home. When you get a balayage, apply the color all over your hair. This will produce a natural look that won’t require as many touch-ups.
Where to Place the Highlights
There is no right or wrong way to place your highlights, but the placement can affect the final result. Highlights placed farther apart will have more contrast, making them look bolder. But highlights placed closer will blend more with your natural hair color, resulting in a subtle look.
The size of the highlights also matters. The thicker the streaks, the more they will brighten up your hair. That’s why most stylists recommend placing the thickest streaks in front of your hair.
Choose the Right Color
There are different highlight colors you could choose. The key is to go at least one shade, if not two shades, lighter than the base color. Otherwise, your color options are limitless.
Depending on your base color, you don’t need to choose blonde. My natural hair color is dark brown/black, and I’ve had red highlights numerous times. I have also had blonde highlights on my dark hair. It looked fine but was very unnatural. If you prefer a natural look, I suggest choosing a color that’s two shades lighter than your natural hair color.
Keep your skin undertones in mind. If you have warm undertones, choose a warm color for your highlights. Golden blonde, strawberry blonde, mahogany, copper, and champagne are good examples. If you have cool undertones, choose a cool color for your highlights. Ash blonde and light ash brown are good examples.
Touch-Ups
Highlights are beneficial because they’re low-maintenance and easy to do at home. But you may still need regular touch-ups, especially if your base color is dark and you chose blonde highlights. Even if this doesn’t sound like the color you chose, you may need to do touch-ups if your color gets too brassy or the highlights change color for any other reason.
Because of this, you’ll need to know how to go about touch-ups. Know the right products you’ll need if you decide to do your touch-ups at home. You may also decide to do your touch-ups at a salon.
Be Wary of Bleach
If your highlighting job requires bleach, it may be best to see a professional. Bleach is required to lighten dark hair but can also cause damage. Your highlighting job may be too intensive if you also need to use a toner to remove some of the brassiness. The exception is if you’re experienced bleaching your own hair.
How to Do Highlights at Home
Now that you know some general tips, it’s time to do some DIY highlights! Follow these steps for the perfect at-home highlights.
Find a Hair Color Kit
There is a variety of hair highlighting kits available. These kits typically contain the dye, brush or another application tool, conditioner, and bleach. Different kits offer various highlighting colors. While blonde is a classic choice, honey may be a better option for those with brown or dark blonde hair.
Remember that you don’t need to use a hair color kit. Hair color kits are just convenient since they include all of the supplies that you’ll need. You can always choose individual dyes and bleaches.
Get the Right Materials
You don’t have to opt for a hair dye kit, but they’re convenient because they include all of the materials you’ll need for the dye job. If you opt to use an individual dye or bleach, you’ll need to get all of the materials to dye your hair. Some core materials that you’ll need include:
- Gloves
- Application brush, bottle, etc.
- Mixing solutions
- Bowl
- Developer
- Bleach
- Comb
- Foil
- Color cape (a towel and clip also works well)
Do a Strand Test
A strand test is when you test the color on a small strand of hair. Ideally, the strand should be really small, and you can hide the strand easily. This is integral to ensure the color works for your hair before going all in and dyeing your whole head.
For best results, do the strand test on dry hair without other products. Keep the dye or bleach on your hair for the recommended amount of time. Rinse out the dye.
Section Your Hair
If the strand test was successful, it’s time to start highlighting your hair! Start by sectioning your hair. This is important to avoid any dye messes.
Most stylists part your hair in three ways: a section on each side, ending at the ears, and a section in the back. Since you’re only doing highlights, you can only part your hair in the front. However, you should clip the back part of your hair, so it doesn’t interfere with the highlighting process.
Paint Each Strand
There are two parts to this method: the foil method and the balayage method. I will explain both here.
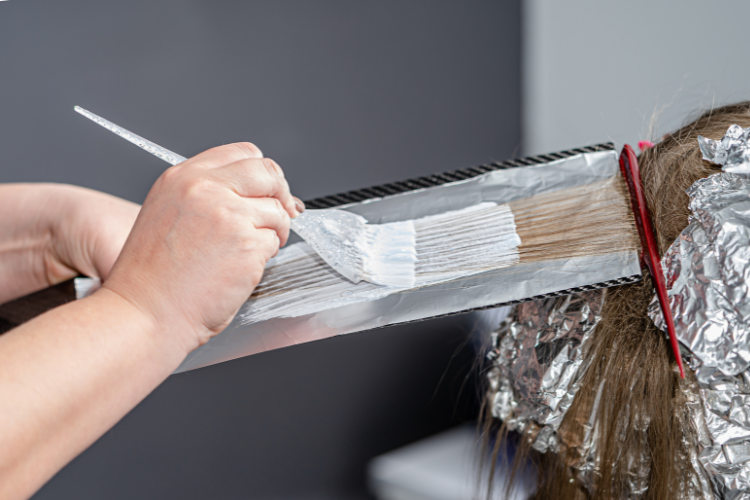
Foil: Start by parting your hair naturally. Take your comb and section off very fine sections of your hair. The sections should be so fine that you can see through them. Place the section on the foil and paint them.
There should be enough bleach on the brush to apply a thick amount of product, but you should also apply the bleach in an even layer. Close the foil around the hair by folding the bottom over the top.
The horizontal weave highlighting technique is the easiest to use. After you finish the foil, get another small piece of hair next to where you applied the first section and repeat the process above. If you want to add lowlights, you can alternate more foils under the foils you already applied.
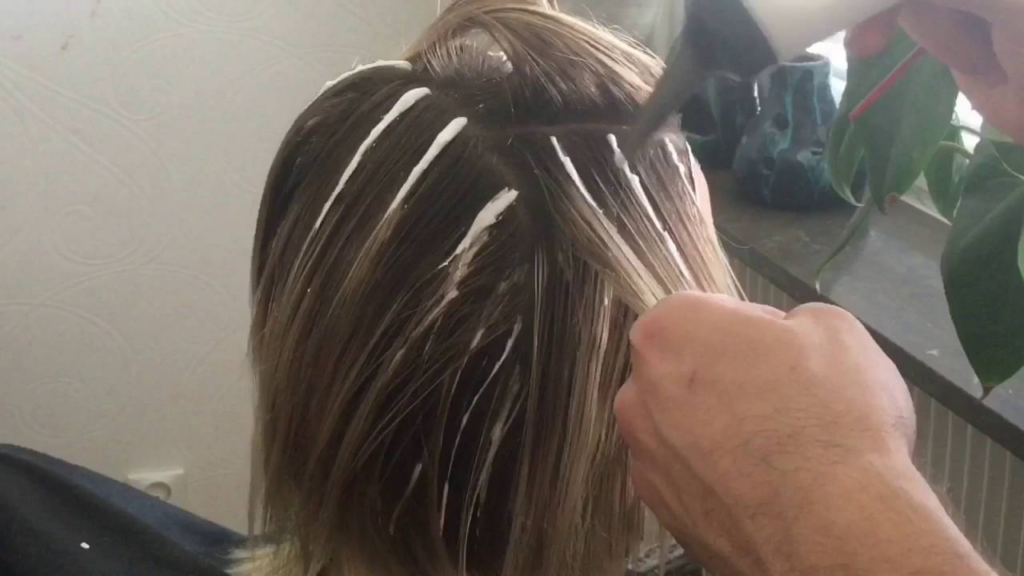
Balayage: A balayage is different because this method doesn’t use foils. Start on one side. With the brush, you’re painting the highlights into your hair.
Try and focus on how your hair naturally lies (be sure to do this on unstyled hair without any products). The balayage should still focus downward, combing out the dyed areas to avoid a harsh line (you can do this with a comb or your fingers). Mirror what you did on the opposite side and on the back of your hair.
From here, leave the dye or bleach in your hair. Follow the manufacturer’s instructions on how long to leave in the dye. If you’re using bleach, wait until your hair turns yellow. Rinse your hair.
Apply the Toner
If necessary, apply a toner. Toners take out the brassiness in your color, which usually happens to brunette hair when going lighter. Toners are essential if you want your highlights to be an ashier color. Even if don’t want a cool-toned color, toners can also make your hair look more natural.
To apply the toner, you’ll first want to wash out the bleach and dry your hair. Mix it into the developer at a 1:2 ratio. Apply where necessary and leave on for 45 minutes.
Instead of toner, you can use either a purple or blue conditioner. These products give your hair moisture while depositing some cool tones to cancel out the brassy tones.
Use a Deep Conditioner
When you wash your hair, follow through with a deep conditioner. Any type of dye job, especially bleach, can dry out your hair. A deep conditioner will give your hair the extra moisture that it needs.
You should apply the deep conditioner after using dye or bleach, except if you’re using toner. If you’re using a toner, use the deep conditioner after shampooing out the toner.
You should continue using deep conditioner weekly if your hair has a straw-like consistency. Use the deep conditioner weekly until your hair no longer has a brittle texture.
Blow Dry
When you’re done washing and conditioning your hair, use a blow dryer on low heat to dry your hair. It’s important to keep your dryer at a lower heat, so your hair is smooth when it’s dry. You don’t have to completely dry out your hair — leaving your hair 80% dry is enough to see the color.
If your color isn’t what you want it to be, don’t panic. You can either try again or make an appointment with your colorist. But wait, maybe you’ll want to avoid the time and money it will take for a color correction. So, should you skip the DIY highlights and just go to a colorist?
When Should You Go to a Colorist?
I’ve been dyeing my hair ever since I was 10 years old. I’ve done my own color, but it was always a single process color (meaning I can do it in one step). I have naturally dark brown/black hair, so I’ve never done my own bleaching before. For the times I got highlights, I always went to a colorist for this reason.
However, this is my personal preference. I understand that many people would rather do their own hair. But there are times I still urge people to see a colorist. If you’re doing a horizontal weave with no bleach, this is something you can do easily DIY. But if you’re doing something more complex and dramatic, definitely visit a professional.
As stated previously, I suggest a professional perform all bleach jobs unless you’re experienced bleaching your own hair. At worst, you can seriously damage your hair. At best, your hair will just be a different color than what you wanted. Either way, a professional will have to fix any of your dye mistakes. It’s just worth it to go to a professional in the first place.
What if you know you won’t use bleach but aren’t sure which color will look best on you? In this case, I still suggest visiting a professional. They can look at your features, base color, and undertones to suggest the perfect highlight color for you.
FAQs
Answer: Here are common reasons why people get highlights:
● Brightness
● Natural use of lighter colors
● Dramatic use of lighter colors
● Lighter colors at the top of the hair
● Transition to a lighter color
● Blending different colors into your base color
Answer: I’ve been seeing a lot of caps such as this one that the woman in the video is wearing. If you don’t want to alternate pieces of hair with foil, the cap is an easy way to apply bleach to your hair. There are other benefits of the cap process other than ease of use. You can better see how the bleach is taking to your hair.
There are downsides to the cap highlight process. This isn’t a good method if you want a more unique look. The cap is better if this is your first time doing highlights at home or if you’re doing a root touch-up.
Answer: Most people start close to the hairline (not the scalp) in the center of the hair, then move toward the front.
Bottom Line
If you want great highlights without stepping foot in a salon, you can do your own highlights at home. While you can do highlights at home, following the correct method will give you the best results. Get the right materials, do a strand test, separate your hair, alternate between sections when painting your hair, use a toner if applicable, and deep condition.
Before doing your highlights, know which color you want to use. There are also different highlighting techniques, such as a balayage, that can call for a different method. It’s also important to know when to see a professional, such as when you have to bleach dark hair.
Looking for more interesting readings? Check out:
- Bleach Bath Hair Guide [2022]: 5 Easy Steps & Why You Might Want To Bleach Bath Your Hair
- How To Lighten Hair Without Bleach: Best Methods To Try!
- 17 Gorgeous Rose Gold Highlight Ideas And Styles To Warm Up Your Hair Color And Brighten Your Complexion
- Ombre Knotless Braids Ideas: Looks You Will Love - December 24, 2022
- How to Find the Best Lime Crime Unicorn Dye: Some Facts to Know about These Vivid Hair Coloring Products - December 11, 2022
- How to Find the Best Peach Hair Dye: Getting This Juicy Hair Color - November 14, 2022