
Root smudges are a relatively new technique that has recently rocked the blonde coloring world in the best way possible.
Almost all the struggles I’ve dealt with doing balayage and the aggravation my clients get from dark roots popping out quickly are solved with a root smudge.
To help you understand how fantastic root smudges are for all the blondes out there, I’ve made this root smudge guide for you and how to do it yourself if you are already blonde.
The first time I ever did a root smudge, it wasn’t even recognized as such yet, and I did it on myself. I had platinum blonde hair all over, and I was done with it, but not so much so that I was ready to go completely dark.
That’s when the idea popped into my head to do a reverse ombre. I colored my roots with the closest color to my natural and faded it down into my blonde to create a balayage look. I did this repeatedly until my blonde hair was gone, and I was back to my natural.
Root Smudge Guide Up Front
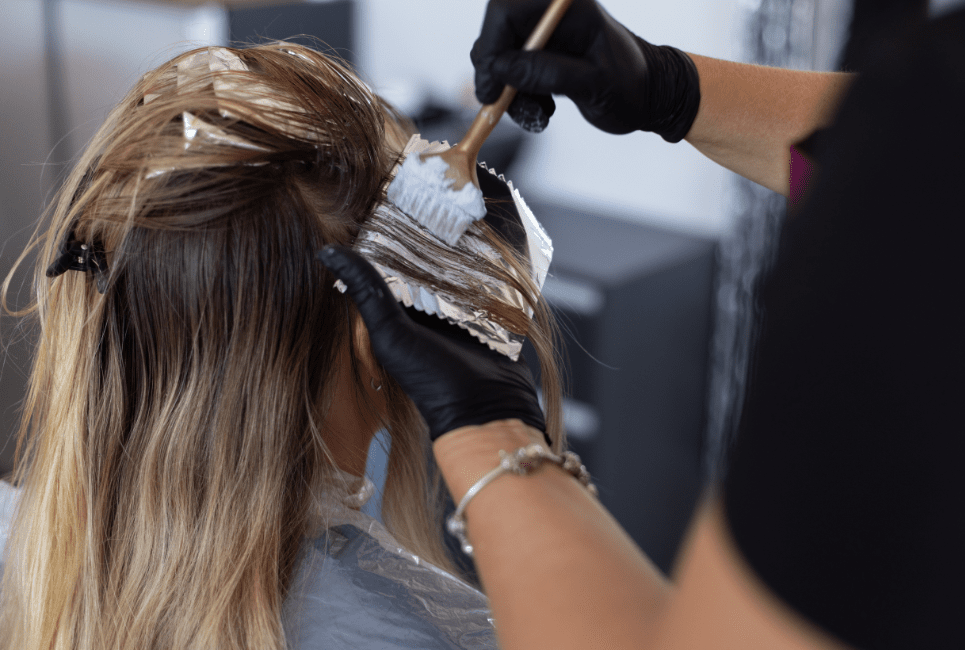
Root smudges are a coloring technique used to create high contrast ombre, blending highlights into the root and shadow roots. They are a quick way to turn your blonde hair into a trendier style that is lower maintenance. I recommend doing a root smudge with demi-permanent hair color and painting it onto the roots like your doing a touchup, then combing it down into your blonde.
What is a Root Smudge?
Doing a root smudge is a way to create a darker root on previously lightened hair. You can create a few different looks with a root smudge, such as a reverse ombre, blended highlights, and a shadow root.
When a root smudge is done on blonde hair, it should look like the blonde was balayged, ombred, or faded into the root.
Benefits of a Root Smudge
Believe it or not, there are quite a few benefits of adding a root smudge onto your blonde hair other than it looks great. Below are just a few of the critical benefits of a root smudge, no matter what type of root smudge you go with.
Create Ashier Colors
Balayage naturally tends to have warmer colors throughout because when they are faded up to the root, the color doesn’t thoroughly saturate, creating warmth. Adding a root smudge tones out the warmth, you get with a balayage at the fading point.
You could also do a standard highlight instead of a balayage and add a root smudge so that warmth is never added, but you still get the rooty effect.
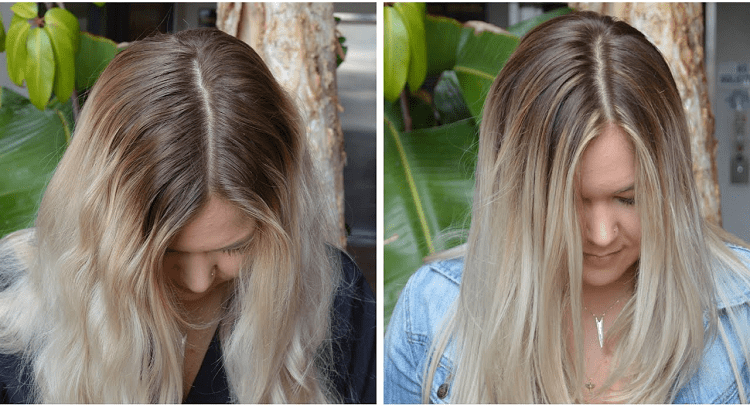
Can be Used to Grow Out Your Natural
Transitioning from blonde back to your natural color can be difficult for a few reasons. Going dark all at once can be alarming, and blonde hair simply does not like to hold on to color.
Doing a smudge root instead of coloring over all of your blonde at once eliminates these common problems. The blonde gradually grows out while blended with your natural, so you don’t have to worry as much about it fading to a weird color or being too much at once.
Creates a Lower Maintenance Blonde
Blondes are one of the most challenging colors to maintain because when they grow out, it creates a stark difference in color from your natural to the lighter hair making it highly noticeable.
Adding a shadow root to your blonde makes the grow out almost unrecognizable. Whether you are simply blending the highlights in with your natural or fading the highlights up to all-over darker color, you get a trendy blonde where the blonde only needs to be redone in double the time.
Types of Root Smudges
Since a root smudge is simply a coloring technique to create specific looks, there are a few different things you can do with it. The main reason you would do a root smudge is to create a blonde that fades into your roots without any warmth. There are other ways to make blonde fade into your roots, such as balayage or ombre, but these methods almost always create a bit of warmth at the fading point.
Reverse Ombre
A reverse ombre is where the darker root color is blended into the ends rather than, the lighter color fading into the root.
The main benefit of doing an ombre with the root smudge method is that you can get a higher contrast ombre by making the ends as light as possible and then painting on a much darker root color. Ombre usually creates some warmth at the fading point, and the root smudge will tone out this warmth.
Blended Root Smudge
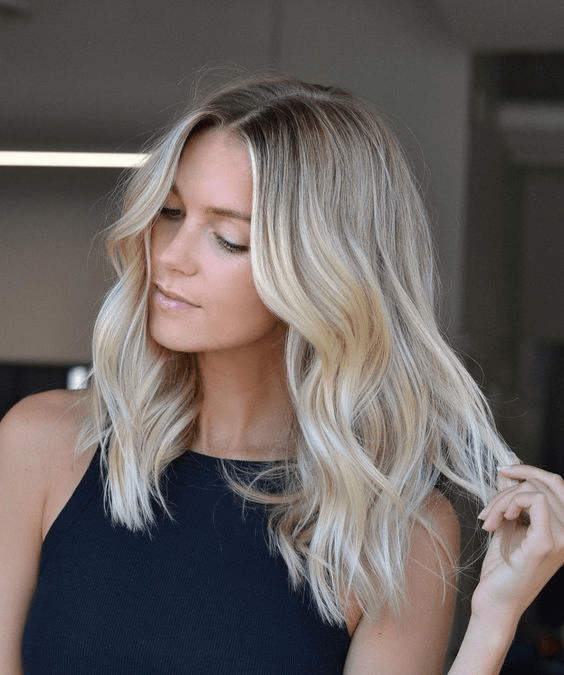
A blended root smudge is a great way to turn your bright blonde highlights into something more lived-in and lower maintenance. This type of root smudge does not entirely cover the highlights but gradually makes them darker up to your natural color.
Doing a root smudge that is slightly translucent like this is an excellent option for those that want to look lighter at the root but still don’t want a harsh grow-out line.
Shadow Root
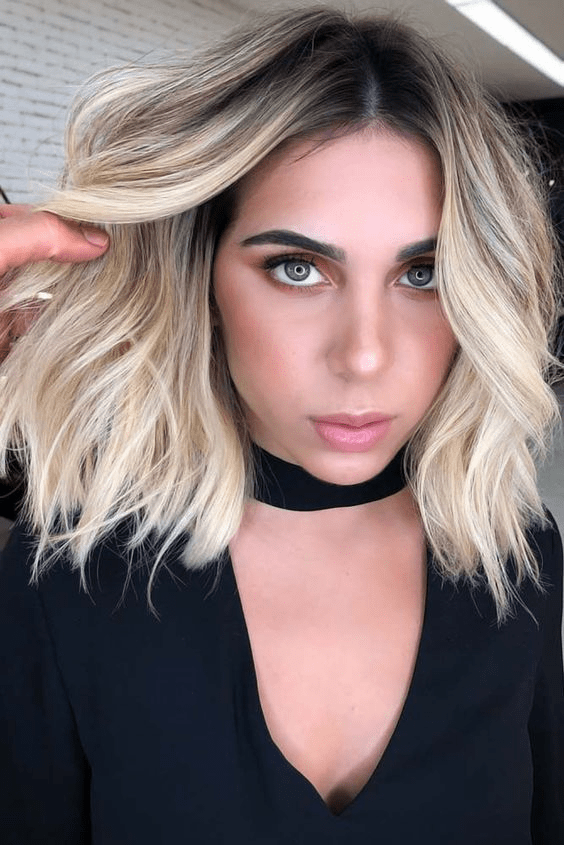
Shadow roots are the perfect in-between of a reverse ombre and a blended smudge root. It takes the high contrast aspect of a reverse ombre by having a stark color difference at the root. Still, it looks like a blended blonde with highlights nearly coming up to the root.
This is an excellent root smudge for those that want to be a very bright blonde but also want the pop that high-contrast colors can give you.
How to Do a Root Smudge
A Quick Hair Color Lesson
I highly recommend doing your root smudges with a demi-permanent color instead of a permanent color. This is because when you color your hair darker with permanent color, it is much more difficult to lift that color out in the future when you try to bring your blonde up. It will most likely never be as ashy.
Demi-permanent is like a semi-permanent color, except it lasts a little longer and pulls a more opaque color. This will gradually fade over six to eight weeks, and you can then quickly bring your blonde up again and do another smudge root. Demi-permanent color is also virtually damage-free. It does not open your cuticle as permanent color does and creates a shinier, healthier color.
You must also start this process with lightened hair, whether that was done by lightening your entire head or highlights. Highlights look better with a smudge root because they blend in better than all-over blonde.
If your hair is all over blonde, it will look more like an ombre, or you can add a few lowlights part of the way through your blonde to create a highlighted look.
Materials Needed
- A color brush that has a comb on one end
- A color bowl
- Demi-permanent color of choice
- Clips and a towel or cape
The materials above and the steps below are solely for the smudge root portion of your hair color. If you have just lightened your hair, you can apply the smudge root directly on your freshly washed, damp hair. You can also apply a smudge root to previously lightened hair that is now dry. Still, it will create a more opaque color rather than a translucent color.
Section Your Hair
My preferred way of sectioning hair is into quadrants, with a part going through the center of your head from front to back ad another part going across your head from ear to ear.
However, you can section your hair in any way you find it will be easiest to reach all of the roots of your hair. You will then start at the bottom of your head, taking a half-inch, diagonal section out of one of the four quadrants.
Paint the Color on Your Roots
You will then take a small amount of color onto your brush and paint it onto your roots. You will only want to paint the color as far down as you want your shadow root, reverse ombre, or blended smudge root to go before it fades into the rest of the hair. For a more specific rule for each type of smudge root, use the list below:
- Shadow Root: Paint the root down about an inch, and the goal is to create just a little depth.
- Blended Root Smudge: Paint the root down one to two inches. You will comb this down significantly in the next step.
- Reverse Ombre: Paint the root down three to five inches, depending on how long your hair is. You want it to be just above half the length of your hair.
Comb Each Section Down Into the Blonde
As you are coloring your roots, you want to comb each section down into the blonde. After you paint the root color onto the section, take the comb side of the color brush, comb through the color, and partly into your blonde.
The more you comb the color down into your blonde, the more it blends. Below are a few general rules, but you can customize this to make it as blended as you want.
- Shadow Root: Only slightly comb the color down into the blonde, wisping out your comb after about an inch.
- Blended Root Smudge: This is the most blended look, so I recommend combing the color down another two or three inches. The further you comb it down, the more it will blend.
- Reverse Ombre: You should also comb this into the blonde another two to three inches, just to make sure the color is layered in your hair nicely, so it moves with your hair rather than sitting in one spot, creating a line.
When combing down the color into the blonde, ensure you are wiping the color off your comb every couple of sections. If you continually brush color down without wiping the comb off, the color will build up on the comb, making it not blend as easily. With color built up on the comb, it is essentially like you are painting on more color throughout the hair, and you will create lines instead of a fade.
Process
Demi-permanent colors must process for twenty to thirty minutes to reach complete opaqueness. However, you can process them for shorter times to create a more translucent look.
The less time you leave it on, it will be slightly lighter than the advertised color, and the highlights will show through a bit, making it more of a blended look. Below is a general rule for how long you should leave on your demi-permanent color for each look.
- Shadow Root: Let the color process for the entire thirty minutes for as much depth as possible.
- Blended Root Smudge: Process for ten to fifteen minutes for a natural look. Let it process for twenty minutes if you are trying to make your root darker than natural.
- Reverse Ombre: The top needs to be opaque, so let that process for thirty minutes. To make this color look even more blended, I like to paint the root color first, then go back through when there are only fifteen minutes left of processing and comb it down into the blonde.
Shampoo and Blow-Dry
Once your color is the desired opaqueness, shampoo, condition, and blow-dry your hair. Remember that your hair will look darker wet than when it is dry, so if it is too dark wet, don’t start freaking out until you dry it. Drying your hair will give you the movement needed to make a root smudge look good and make it appear lighter.
Root Smudge Products
Hair Dye Coloring Kit
Pros
- It comes with everything you need to do a root smudge
- Reusable gloves
- Silicone bottom bowl to prevent slip
- Easy to clean
Cons
- It only comes with one of each thing, and you may want two.
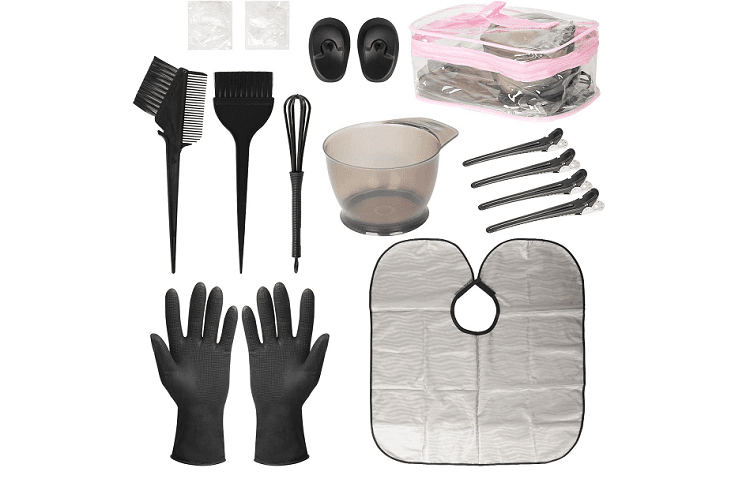
These hair dye coloring kits come with everything you need for a root smudge, like a color bowl, a brush with a comb on one side, a coloring shawl, gloves, and clips.
They also come with a whisk to make mixing the color easier and silicone earmuffs to keep your ears from getting stained with color. On top of that, the gloves are reusable, the bowl is anti-slip to prevent spillage, and everything is easy to clean when you’re done.
Even though this kit has everything you need, I wish it came with double the reusable gloves, bowl, and color brushes. It’s always nice to have a spare set of tools in case something happens.
For instance, if you drop your color brush on the ground, it would be much quicker to grab an extra instead of having to clean all the dirt off the one you just dropped on the floor.
Color Charm Demi-Permanent Color
Pros
- Shiny color
- 1:2 ratio
- Very opaque
- Can cover grey
Cons
- Color pulls slightly darker than advertised
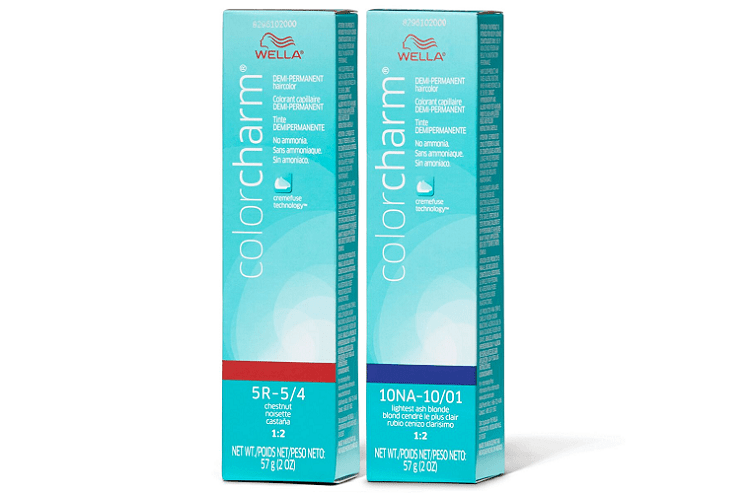
Wella has stepped up their hair color game lately, with some colors even being used by professionals in the salon. Color charm demi-permanent hair color is one of Wella’s color products that work exceptionally well.
It is strong for a demi-permanent color, being able to even blend grey, which is not usually the case for demi-permanent color. It is also mixed with one part color and two parts developer, making a little go a long way.
One thing you need to be wary of with Color Charm is that the demi-permanent color pulls slightly darker than you would expect. You can choose a color a shade or two lighter than what you want or let it process for a shorter time. However, this may benefit those doing a root smudge to achieve a shadow root.
Ion Demi-Permanent Cream Color
Pros
- Very shiny color
- A wide variety of color choices
- Conditioning consistency
Cons
- Not very long-lasting
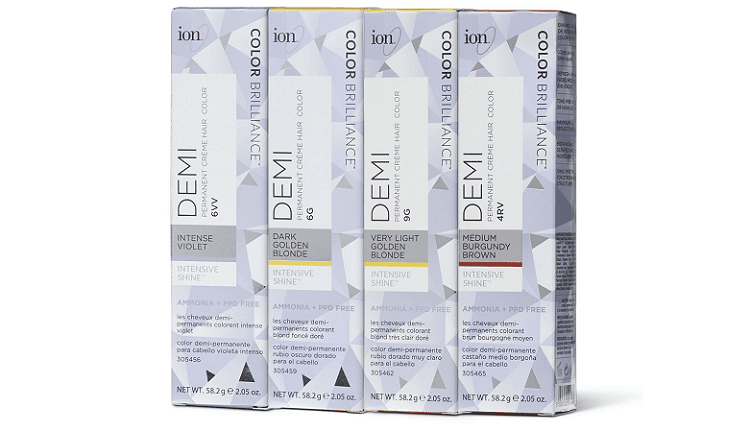
If you want a color that will make your hair look shiny and healthy, look no further. Ion demi-permanent color is one of the shiniest colors I’ve ever used. The color itself almost feels like a conditioner. You also have a lot of color choices to choose from, such as reds, purples, blondes, and golden colors.
Ion demi-permanent color should last at least six weeks, but it is not the longest-lasting demi-permanent color. I recommend using the maintenance steps listed below in the “root smudge maintenance tips” section.
You may want to choose this color if you like to be very blonde because it fades out so well, and it will make it easier to lift your hair blonde in the long run.
Clairol Natural Instincts Demi-Permanent
Pros
- Fast working
- Can blend grey
- Looks very natural
- Very opaque color
Cons
- It May work a bit too fast
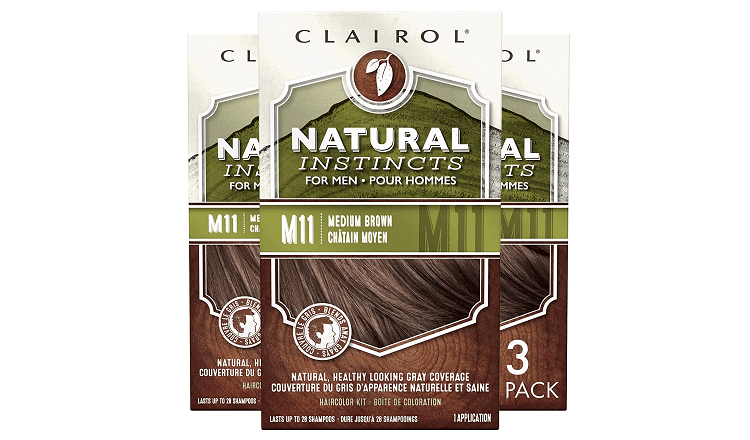
Although this is a men’s color technically, it does not only have to be used on men. Whenever I do root smudges in the salon, I almost always use our men’s color line because it is much quicker and creates a more natural-looking opaque color.
They are designed to blend men’s grey with their natural color, which does exactly the same on highlights or lightened hair. I don’t think there is any other demi-permanent color more natural-looking.
Natural Instincts also give you the same color effect of regular demi-permanent color in half the time, with it only needing to be processed for ten minutes.
This is nice, but you also have to work quickly, or elsewhere you started, your root smudge may end up darker than where you ended. I only recommend using this if you are going for a shadow root look and you are doing it on wet hair.
Root Smudge Maintenance Tips
Since root smudges are done with demi-permanent color that fades out over some time, there are specific steps you should take to prolong the maintenance needed.
The demi-permanent color sits on the outside and within the layers of the cuticle of your hair, which means the color pigments can quickly come out of your hair if not taken care of properly. Using the tips below will ensure that your color doesn’t prematurely fade.
Shampoo Less
Suppose you are already in the habit of not shampooing daily; great! You don’t have to do anything more with this step. If you are not or even shampoo every other day, I recommend cutting back a bit because the shampoo will not only clean the oil out of your hair but will also gradually clean the demi-permanent color out too.
I like to put my hair up in a bun when I don’t shampoo, but you can also use a shower cap to help keep out any humidity.
It may take a while for your hair to get used to not being shampooed every day, so I recommend using a dry shampoo in between washes. This minimizes the appearance of oils in the hair and gives it a quick boost of volume. It could take up to a month for your hair to start getting used to fewer shampoos and reduce oil production.
Use a Heat Protectant
Heat is another element that can pull the demi-permanent color out quicker than usual because heat slightly opens the cuticle and allows things to go in and out freely.
Heat protectants protect your hair from heat by coating it so that it can not affect anything lying within your cuticle. I recommend getting a leave-in conditioner with a heat protectant for blow drying your hair and a spray heat protectant for the use of hot tools.
Touch Up Every Six to Eight Weeks
By the end of six to eight weeks, your demi-permanent color should be faded to the point that it is almost unnoticeable. You will have to repeat the steps listed above in the “how to do a root smudge” section at this point to rejuvenate your color.
You do not need to move up your blonde every time you do this step unless you want to keep your hair very blonde. The root smudge will make your blonde look like it is supposed to be lived in.
FAQs
Answer: Root smudges are typically done with demi-permanent hair color, which lasts six to eight weeks if maintained correctly. Luckily, they are virtually damage-free, so you can overlap a root smudge as often as you want without worrying about the integrity of your hair.
This is also beneficial because you won’t get a harsh line when your root smudge grows between your natural hair color and the root smudge color.
Answer: A root smudge is a coloring technique, whereas a shadow root is a finished style. You can create a shadow root with a root smudge technique, as well as a reverse ombre and a blended rooty look. A shadow root is usually done with a darker semi-permanent color. It only covers the top inch or so of the hair.
Answer: Balayage and root smudges are different in the way that balayage is going to create more warmth, whereas root smudges can be a cooler tone. Both give you the same rooty effect that looks effortless and lived in, but root smudges can create a higher contrast color than balayage. You may also do a root smudge on a balayage if you want your base color to look darker than it naturally is.
Answer: If you are getting a root smudge as an add-on service to a highlight or any other lightening service, they will only cost $30 to $60 depending on where you go and how much color is used.
Going into the salon to only have a root smudge done will cost more because you will have to pay for the shampoo and blow-dry. Expect to pay anywhere from $60 to $90 for a root smudge by itself.
Answer: Yes, you can! You will want to use demi-permanent hair color for this, so it blends in with your highlights or blonde ends easily. You then paint on the color like you are doing a root touchup and comb it down into your blonde. Read above for a more in-depth explanation of how to do a root smudge at home.
Should You Try A Root Smudge?
Root smudges can be an effortless way to create a lived-in look without spending the big bucks that a balayage costs you. It could be the only way to create an ashy, high-contrast balayage look. If these points interest you, I think you should try a root smudge.
My favorite type of root smudge is a blended rooty look because it is the perfect in-between of a shadow root and a reverse ombre.
Looking for more interesting hairstyles? Check out:
- Wispy Bangs Ideas & Style Guide: Which Style Is Best For You
- Black Ombre Hair Ideas & Style Guide: Which Is Your Favorite Look?
- Cinnamon Hair Color Ideas & Style Guide You Need To See For 2022